Contents:
- Why Flooring Demolition and Replacement Matters More Than You Think
- The Real Cost of Skipping Proper Demolition
- The Basics: What a Full Demolition and Replacement Actually Involves
- Assessment and Planning
- Removal of the Old Flooring
- Subfloor Preparation
- Installation of New Flooring
- Finishing and Punch-List Work
- Intermediate Level: What Changes the Timeline and Budget
- Square Footage Isn’t the Only Variable
- Room-by-Room Complexity
- Whole-House Versus Room-by-Room Projects
- Material Lead Times
- Working Around Florida’s Humidity Cycles
- Advanced Nuances: The Details That Separate a Good Job From a Great One
- Reading a Slab Correctly
- Transition Planning Between Rooms and Zones
- Indoor-Outdoor Continuity Projects
- Structural Subfloor Repairs
- How Tampa Bay Floors Approaches a Demolition and Replacement Project
- Full Demolition Versus Floating a New Floor Over the Old One
- Common Mistakes Homeowners and Contractors Make
- Frequently Asked Questions
- How long does a full flooring demolition and replacement project typically take?
- Do I need to move out of my house during demolition?
- Is it cheaper to demolish one room at a time or the whole house at once?
- What happens if the crew finds damage under the old flooring?
- Can I install new flooring myself after having demolition done professionally?
Picture a Saturday morning in your kitchen. You’re standing on twenty-year-old tile, coffee in hand, and you notice the grout lines have gone the color of wet sand no matter how many times you scrub them. A few of the tiles near the sink have started to crack in that telltale spiderweb pattern. You’ve patched, you’ve re-grouted, you’ve told yourself it’s fine for another year. Then one day it isn’t fine anymore, and you find yourself researching flooring demolition and replacement instead of another quick fix. That moment — the switch from patching to rebuilding — is where most homeowners in the Tampa Bay area start their journey, and it’s exactly where this guide picks up.
A full flooring demolition and replacement project is a bigger undertaking than most people expect the first time they go through it. It touches your subfloor, your baseline moisture readings, your furniture logistics, and sometimes your HVAC ducts if they run beneath the slab. Done right, it resets a room for the next fifteen to twenty-five years. Done poorly, it creates problems that don’t show up until the new floor starts failing in year two. This guide walks through the entire process, from the basics of why demolition matters to the advanced details that separate a mediocre job from a lasting one.
Why Flooring Demolition and Replacement Matters More Than You Think
Homeowners often assume new flooring is simply a matter of removing the old surface and laying the new one on top. That assumption is where a lot of budget overruns and callback repairs originate. What sits underneath your visible floor — the subfloor, the slab, the moisture barrier, the leveling compound — determines whether your new floor lasts five years or twenty-five. Skipping proper demolition, or doing it carelessly, buries problems instead of solving them.
In Florida specifically, this matters even more. High humidity, frequent slab moisture intrusion, and a housing stock that spans everything from 1960s block homes to brand-new coastal builds means every subfloor tells a different story. A rushed demo crew that doesn’t test moisture levels or check for old adhesive residue is setting up the next flooring install to fail. That’s the core reason full demolition and replacement, handled correctly, is worth the investment over a quick refresh.
The Real Cost of Skipping Proper Demolition
Installing new flooring over an improperly prepared subfloor is one of the most common — and most expensive — mistakes in residential construction. Vinyl plank will telegraph every bump and crack beneath it within a year. Tile set on a slab with unresolved moisture will develop efflorescence, that white chalky bloom, within months. Hardwood laid over concrete without a proper vapor barrier can cup or buckle during Tampa’s rainy season. None of these are cosmetic annoyances; they’re structural failures that require tearing out the new floor and starting over, often at double the original cost.
The Basics: What a Full Demolition and Replacement Actually Involves
For anyone going through this for the first time, it helps to break the project into its component stages. A typical residential flooring demolition and replacement moves through five phases: assessment, removal, subfloor preparation, installation, and finishing.
Assessment and Planning
Before a single tile is pried up, a competent contractor walks the space and checks several things: the type of existing flooring, the subfloor material (plywood, OSB, or concrete slab), moisture content, and whether any transitions — thresholds between rooms, stair nosings, expansion joints — will need to be rebuilt. This stage also includes measuring for material quantities and identifying obstacles like built-in cabinetry, HVAC vents, or plumbing access panels that will need to be worked around.
Removal of the Old Flooring
This is the demolition phase people picture: hammers, pry bars, dumpsters. But the method varies enormously by material. Ceramic and porcelain tile usually requires a jackhammer or rotary hammer to break the bond with thin-set mortar. Hardwood can sometimes be pulled up plank by plank if it’s being salvaged, or ripped out with a floor scraper if it’s headed for the dumpster. Carpet comes up fastest, often in under an hour for an average bedroom, but the tack strips and staples underneath still need to be removed by hand. Vinyl and linoleum, especially older sheet goods, sometimes contain asbestos in homes built before 1980, which changes the entire removal protocol and requires specialized handling.
Subfloor Preparation
Once the old material is gone, the real work starts. Any residual adhesive, mortar, or staples get ground down or scraped clean. Cracks in a concrete slab are filled and, if moisture readings come back high, a topical moisture mitigation system may be applied before anything else touches the floor. Uneven spots get leveled with self-leveling compound, sometimes poured in sections and left to cure for 24 hours before the next step.
Installation of New Flooring
With a clean, level, moisture-appropriate base, the new material goes down according to its specific method — thin-set and grout for tile, click-lock or glue-down for luxury vinyl plank, nail-down or floating installation for hardwood. This is usually the fastest phase relative to demolition and prep, which often surprises homeowners who expected the opposite.
Finishing and Punch-List Work
Baseboards get reinstalled or replaced, transitions get set, and the space gets a final walkthrough. This is also when any touch-up paint or trim work happens, since removing baseboards for floor access almost always leaves some marks on the wall.
What the Pros Know: A moisture test isn’t optional paperwork — it’s the single most predictive factor for whether tile or vinyl flooring will fail prematurely in a Florida home. Crews who skip the calcium chloride or relative humidity test on a slab are gambling with your investment. Ask any contractor bidding your job whether moisture testing is included, and if the answer is vague, treat that as a red flag.
Intermediate Level: What Changes the Timeline and Budget
Once you understand the five basic phases, the next layer of knowledge is understanding what pushes a project from a quick weekend job to a two-week ordeal — and what pushes a $6,000 estimate to $14,000.
Square Footage Isn’t the Only Variable
Two 1,200-square-foot homes can have wildly different demolition costs depending on what’s underneath the existing floor. A house with a single layer of vinyl over plywood is a straightforward removal. A house where a previous owner installed tile directly over old vinyl, which was installed over the original hardwood, means three layers of demolition instead of one. This “flooring archaeology” is extremely common in homes that have changed hands multiple times, and it’s something a walkthrough alone can’t always reveal — sometimes it only becomes clear once demolition starts.
Room-by-Room Complexity
Kitchens and bathrooms take longer than bedrooms and living rooms, and not by a small margin. Cabinets, islands, and plumbing fixtures need to be worked around or temporarily removed. Toilets have to come out and get reset. Dishwashers need to be disconnected. A bathroom that looks like a simple 60-square-foot room on paper can add a full day to a project timeline because of fixture removal and reinstallation.
Whole-House Versus Room-by-Room Projects
Homeowners doing a full-house replacement face a decision: demolish and install everything at once, or move room by room while living in the house. Whole-house projects are faster in total labor hours and usually cheaper per square foot because crews aren’t remobilizing repeatedly, but they require finding somewhere else to stay for several days if there’s only one working bathroom during the process. Room-by-room approaches let you keep living at home but stretch a project that could take five days into three or four weeks, with dust and noise recurring each time.
Material Lead Times
Demolition can usually start on schedule, but installation sometimes stalls waiting on material. Porcelain tile ordered from certain manufacturers can take four to six weeks to arrive, especially in less common sizes or finishes. Engineered hardwood with a specific stain match can have similar delays. Experienced tampa flooring contractors build these lead times into the project schedule from day one rather than discovering the gap mid-demolition, which avoids the awkward scenario of a bare subfloor sitting exposed for a month.
Working Around Florida’s Humidity Cycles
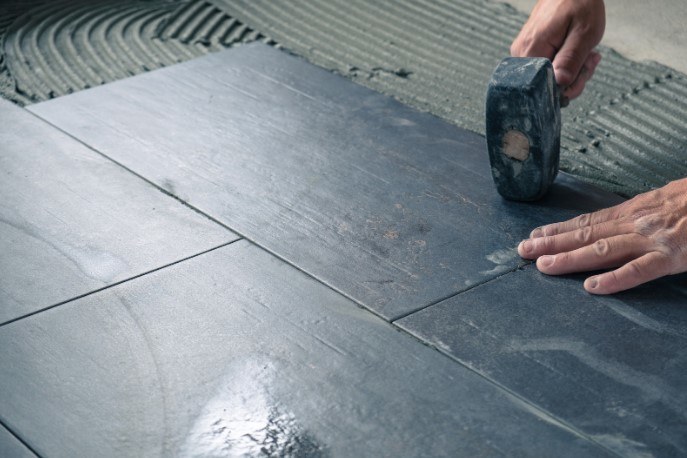
Tampa Bay’s rainy season, roughly June through September, adds a wrinkle to timing. High ambient humidity slows the cure time for self-leveling compounds and thin-set mortar, and it raises the risk of moisture-related issues if a slab hasn’t fully dried between phases. Contractors who work in this climate year-round factor in extra cure time during summer months rather than rushing the schedule and risking a callback.
Advanced Nuances: The Details That Separate a Good Job From a Great One
For readers who already understand the basic process and want to know what actually distinguishes a premium result, this section covers the finer points.
Reading a Slab Correctly
Not all concrete slabs are created equal. Older Tampa Bay homes, particularly those built in the 1970s and 1980s, often have slabs poured without a vapor barrier beneath them, meaning ground moisture migrates upward continuously. A relative humidity test using an in-situ probe, left in the slab for at least 24 hours per ASTM F2170 standards, gives a far more accurate reading than a quick surface moisture meter. Crews that rely only on a handheld meter are getting a snapshot of surface conditions, not the moisture actually moving through the slab over time.
Transition Planning Between Rooms and Zones
A full demolition and replacement project that spans multiple rooms with different flooring types — tile in the kitchen, vinyl plank in the living room, carpet in bedrooms — needs a transition strategy planned before installation begins, not improvised afterward. Height differences between materials, expansion gaps, and threshold placement all need to align with doorway swing and sightlines. A poorly planned transition strip becomes an obvious visual seam that undercuts an otherwise excellent installation.
Indoor-Outdoor Continuity Projects
A growing number of Tampa Bay homeowners are extending their flooring vision beyond interior rooms, connecting a kitchen or living area visually with a lanai, pool deck, or patio using matching or complementary tile. This kind of project involves a different set of technical considerations than interior demolition: slip resistance ratings, freeze-thaw isn’t a concern here but UV fading and pool chemical exposure are, and drainage slope has to be engineered correctly around the pool’s coping. https://tampabayfloors.us/services/outdoor-pools/outdoor-tile-installation also requires different setting materials — polymer-modified thin-set and epoxy grout tend to hold up far better against Florida sun and chlorine than standard interior products, and choosing the wrong setting bed is a mistake that shows up as cracked or lifted tile within a single summer.
Structural Subfloor Repairs
Occasionally, demolition reveals rot, termite damage, or water-damaged plywood beneath the existing floor — something no amount of surface inspection could have caught beforehand. This is where a demolition crew’s experience really shows. A contractor who can identify compromised subfloor immediately, quote the repair honestly, and pivot the project plan without derailing the timeline is worth significantly more than one who either misses the damage or uses it as an excuse to pad the invoice.
How Tampa Bay Floors Approaches a Demolition and Replacement Project
Tampa Bay Floors has handled hundreds of these projects across Hillsborough, Pinellas, and surrounding counties, and the approach reflects lessons learned from the region’s specific building stock. Every project starts with an in-person moisture assessment rather than a phone-quoted estimate, because a slab in a 1978 ranch house in Seminole Heights behaves very differently from a slab in a 2019 build in Wesley Chapel. That distinction changes material recommendations and, sometimes, the entire scope of work before a single tile is broken.
What sets Tampa Bay Floors apart from a lot of general contractors who also “do flooring” is the specialization in the demolition phase itself. Many companies treat demo as a quick, low-margin task to get through before the profitable installation work begins, and it shows in rushed subfloor prep. Tampa Bay Floors treats flooring demolition and replacement as a single continuous process handled by the same crew from teardown through final installation, which eliminates the miscommunication that happens when one company demos a floor and a separate company installs on top of it without knowing what was found underneath.
The team also carries specific experience with the indoor-outdoor tile projects that are increasingly popular around Tampa Bay’s pool culture — matching interior tile runs out to a lanai or extending a kitchen floor visually onto a covered patio, using setting materials rated for sun and chemical exposure rather than treating outdoor tile as an afterthought of the interior job. That’s a detail plenty of flooring companies get wrong because they don’t do enough outdoor work to have developed the muscle memory for it.
Full Demolition Versus Floating a New Floor Over the Old One
A commonly confused alternative to full demolition is “floating” a new floor — typically luxury vinyl plank or laminate — directly over the existing surface without removing it. It’s marketed as a faster, cheaper option, and in narrow circumstances it can work. But the two approaches solve different problems and shouldn’t be treated as interchangeable.
Floating over an old floor skips the demolition dumpster and shortens labor time, which is why it’s appealing on a budget. It can be a reasonable choice when the existing floor is flat, structurally sound, and made of a single thin layer — vinyl over plywood, for instance, with no cracking or lifting. But it does nothing to address subfloor moisture, doesn’t fix an uneven or damaged base, and adds height to the room that can create problems at doorways, cabinet toe-kicks, and appliance clearances. It also traps whatever is under the old floor — old adhesive, mold, or damaged material — sealed beneath the new one instead of resolving it.
Full demolition and replacement, by contrast, resets the room from the subfloor up. It costs more upfront and takes longer, but it’s the only approach that actually addresses moisture issues, structural damage, or an outdated layout underneath the visible surface. For a floor that’s failing due to underlying problems rather than simple cosmetic wear, floating a new layer on top is a temporary patch, not a real fix.
Common Mistakes Homeowners and Contractors Make
Some of these mistakes come from homeowners trying to save money in the wrong places; others come from contractors cutting corners under time pressure. Either way, they’re worth knowing before a project starts.
- Skipping the moisture test to save time. A rushed crew that installs tile or vinyl over a slab without checking relative humidity is setting up an efflorescence or adhesive failure problem that typically surfaces six to twelve months later, well after the invoice is paid.
- Choosing the cheapest bid without asking what it includes. A low estimate that doesn’t include disposal fees, subfloor leveling compound, or moisture mitigation will almost always balloon once the real conditions of the subfloor are revealed mid-project.
- Ignoring transition planning between rooms. Installers who don’t plan height and threshold transitions before starting installation often end up with mismatched floor heights that create trip hazards at doorways.
- Reusing baseboards without checking for damage. Baseboards pried off carelessly during demolition often crack or split, and reinstalling damaged trim creates visible gaps along the new floor’s edge.
- Underestimating disposal logistics. Old tile and concrete debris is heavy — a single bathroom floor demo can generate several hundred pounds of debris — and crews without a proper dumpster or haul-away plan sometimes leave debris piled in a driveway for days.
- Assuming every outdoor tile project uses interior methods. Contractors without dedicated outdoor experience sometimes use interior-grade thin-set or grout on a pool deck, which fails within a season under UV exposure and chlorine splash.
- Not accounting for acclimation time for wood flooring. Hardwood and even some engineered products need time to acclimate to the home’s humidity before installation; skipping this step in Florida’s climate leads to gapping or cupping after the first humid season.
Frequently Asked Questions
How long does a full flooring demolition and replacement project typically take?
For a single average-sized room, demolition and installation combined usually run three to five days, including subfloor prep and cure time. A whole-house project, depending on square footage and material choice, typically runs one to three weeks. Tile projects tend to run longer than vinyl plank because of thin-set and grout cure times.
Do I need to move out of my house during demolition?
It depends on scope. A single-room project rarely requires relocating, though dust containment and noise are worth planning around. A whole-house project, especially one that removes bathroom flooring entirely, often makes staying elsewhere for a few days more practical, particularly if there’s only one working bathroom in the home.
Is it cheaper to demolish one room at a time or the whole house at once?
Whole-house demolition is almost always cheaper per square foot because crews mobilize once instead of multiple times, and material can be ordered in a single bulk purchase. Room-by-room projects offer more flexibility for budgeting over time but usually cost more in total labor.
What happens if the crew finds damage under the old flooring?
This is more common than most homeowners expect, especially in older homes. Rot, termite damage, or water-stained subfloor sometimes only becomes visible once the existing floor is removed. A reputable contractor pauses, documents the damage, and provides a clear repair estimate before continuing rather than covering it up.

Can I install new flooring myself after having demolition done professionally?
Technically, yes, but it introduces a coordination risk. If the demolition crew and installation crew are different, any subfloor issues discovered during demo need to be communicated precisely, and responsibility for the final result gets split between two parties. Most experienced professionals recommend handling demolition and installation as one continuous project specifically to avoid this gap.